IP Camera Recording
This documentation describes how quickly and easily an IP camera can be recorded with C-MOR.
The main functions of C-MOR are the creation of video recordings through motion detection and time-lapse recordings. If you have not yet downloaded and installed C-MOR, please go to the following website for a free version of the IP camera surveillance:
After installation, C-MOR can be called up via the set IP address or even via the preset IP address in the web browser, for example http://192.168.1.2:

Change into the Menu "System Administration":

Scroll Down to the Menu Point "Camera Configuration" and select "Change Configuration Camera 1":

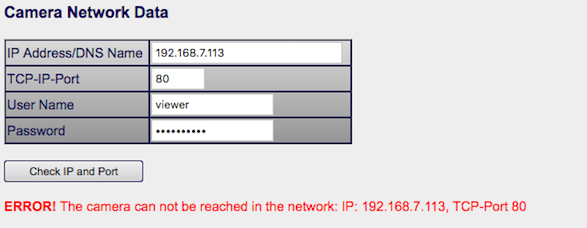
First insert the Camera IP Parameters, IP Address etc.:

Please use the Button "Check IP and Port" to verify that the Camera is reachable from C-MOR. If it's indicated in red as above is the Camera is not reachable.
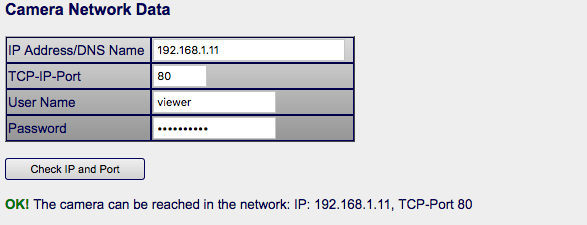
If the IP Parameters are correct it's displayed as follows with a green "OK":

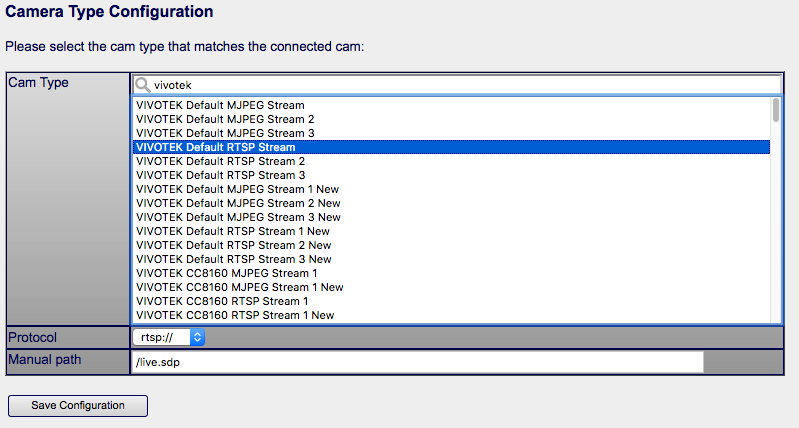
Select the Camera Type from the Camera Database. Use the search field to find the right Camera Model. Depending on the selection the port in the field above may change!

Save the settings. C-MOR jumps to the status page:

Activate the Camera now. It's displayed in the page:

Select the "Start Menu" and watch the Camera live if the settings made before are correct:

Now the camera is integrated. Parameters as motion detection etc. can be optimized now. Select the "Cam 1" menu to review the recordings C-MOR now makes automatically!
Now download and review the manual of C-MOR to learn how to setup details as there are motion detection parameters, picture mask, frame rate etc.:
